Hey there! Carl here. Quick update on the characters.
I’ve done the archer for the game, using a couple new workflows. I reused the base mesh of the warrior (body,teeth & eyes) as redoing it would be a waste of time.
I always keep myself open to new opportunities to make my workflow faster / more efficient. Before and during working on the archer, i put some time into a couple hardsurface workflows that don’t require me to move out of ZBrush.
Some of these are the ones shown below (Topology brush and ZModeler in combination with polygroups and creasing)
Work smart not hard ( ͡° ͜ʖ ͡°) (although both is best)

I mainly use substance painter 2 when it comes to texturing characters. Photoshop for minor tweaks and fixes.
A tool I use all the time is the mask by Polygons / UV shell tool. I’ve seen a surprising amount that don’t even know about this, which is why i wanted to point it out. When the tool is active, you simply make a black mask and click on the uv shells you want masked. You can also select the box icon and mask whole parts. (pointed out in the image below)

The world space normals and baked lights are great for generating a stylized diffuse base.

I used the position map to add a black to white gradient on top of the texture.

A paint effect on the mask were made through the use of the curvature and world space normals maps.
Through precise adjustments, i got a very decent look that blends well and is easily adjustable.


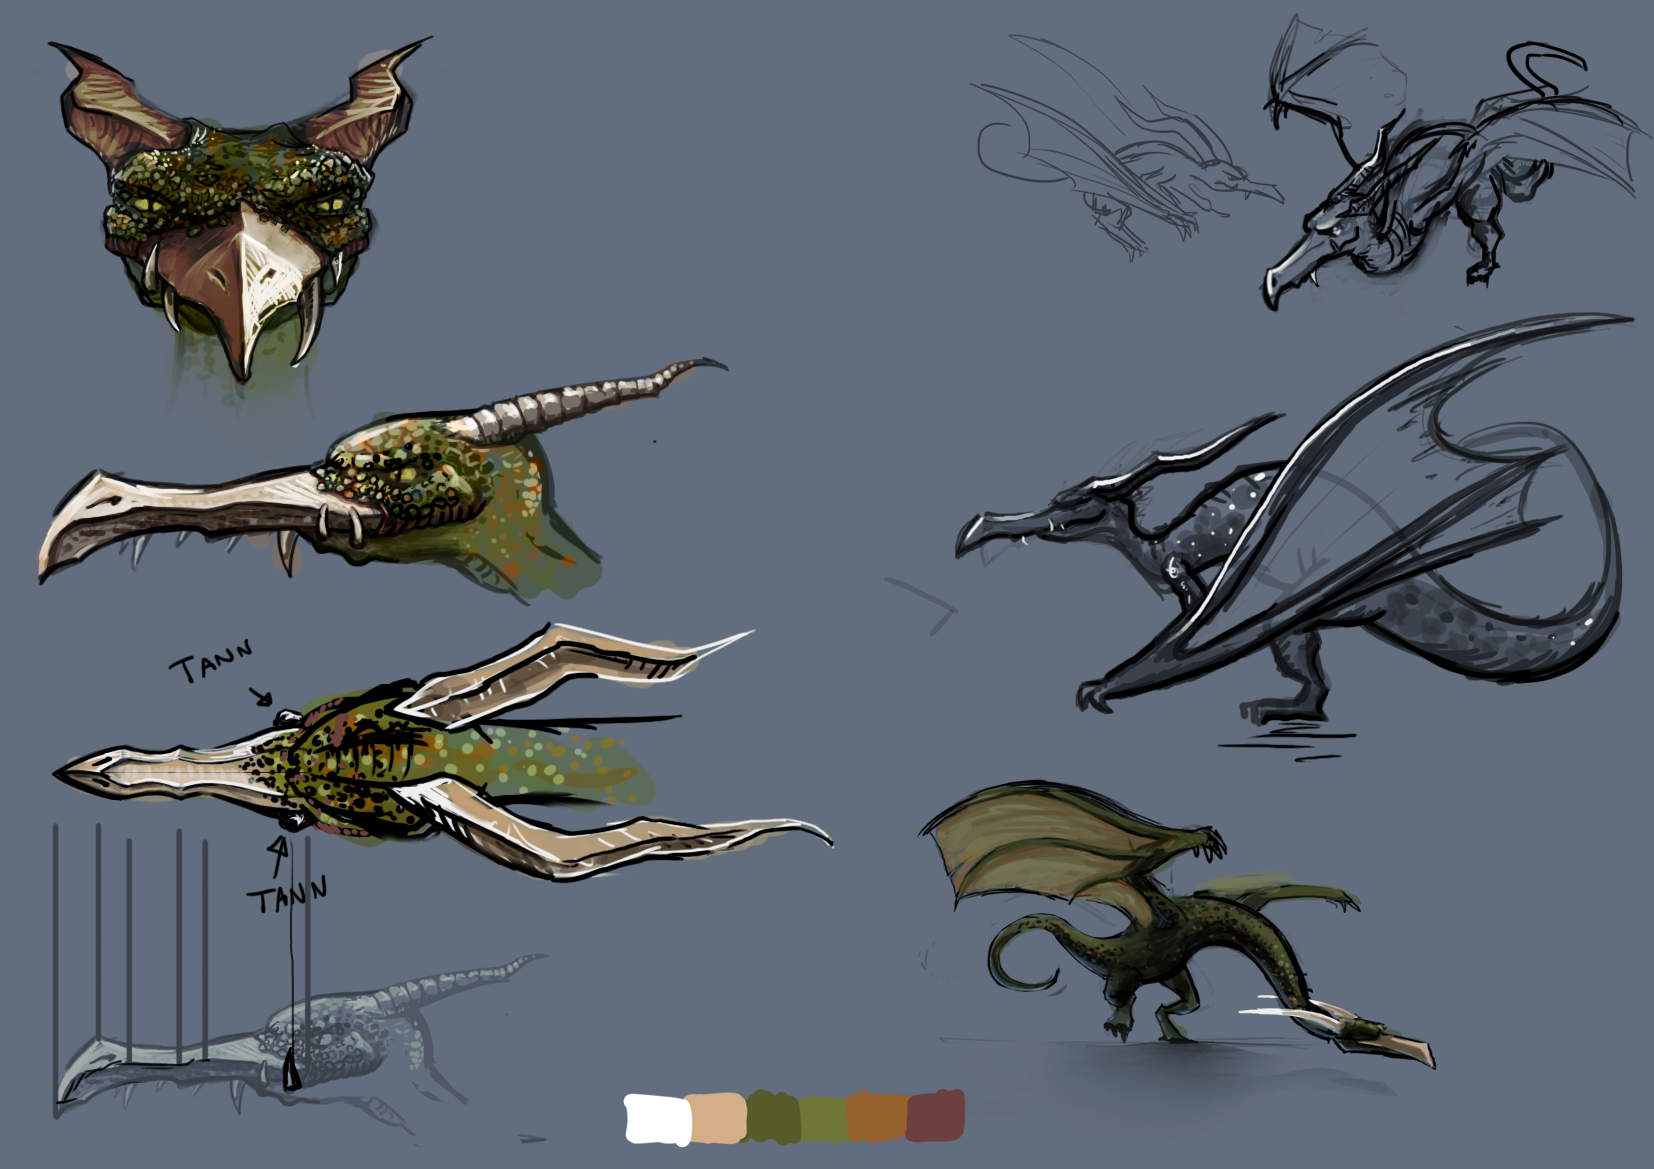
I’ve also started on the 3rd character for the game. The wyvern, it’s currently in a very early blockout phase, but to give you a hint on what the character will look like, here’s the concept and blockout.