In this article by Richard Moore, author of Unreal Development Toolkit: Beginner's Guide, we will learn the following:
- UDK download and installation
- Launching the editor
- Movement and rotation
- Using BSP brushes and static meshes

So let's get on with it. We will first look at downloading the UDK, and install it on your PC.
Time for action – UDK download and installation
- Download the latest version of UDK.
- Log on to www.udk.com and download the latest version of unreal development kit beta. Once you download the UDK Installer, go ahead and install the UDK. The default directory for installing UDK is C:\UDK\UDK-VersionRelease.
- Version Release will be the month and year that the UDK you downloaded was built.
UDK folder structure
The UDK folder structure looks like the following screenshot:
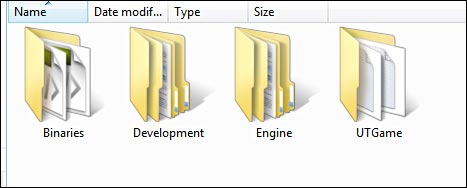
The UDK folder structure consists of the following four folders:
- Binaries: game/binary executable.
- Development: source code for UDK.
- Engine: engine files.
- UTGame: game files. For level-design and environment creation, the important folder here is the content folder. The packaged environment's assets such as models, textures, materials, sounds, and such are stored here.
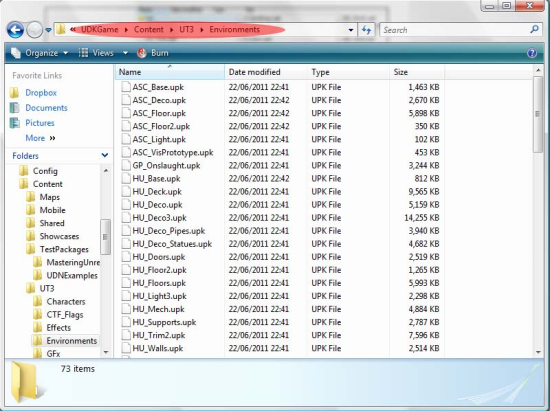
For environment creation and level design, the most important folder is UTGame | Content | Environments. It contains all the files you need to create your map, as shown in the following screenshot:
UDK extension is the UDK package's name. This is how the models and textures are stored in UDK. Think of UDK extension as folders. Inside those folders are stored all the models, animations, textures, materials, and similar assets. You can browse the UDK files through the UDK editor.
UDK is the map file extension.
Time for action – launching the editor
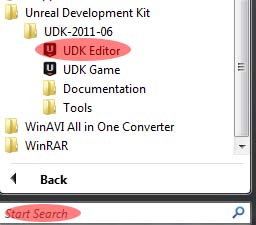
- To launch the unreal editor, go to the Start Menu | Unreal Development Kit | UDK Version | Editor.
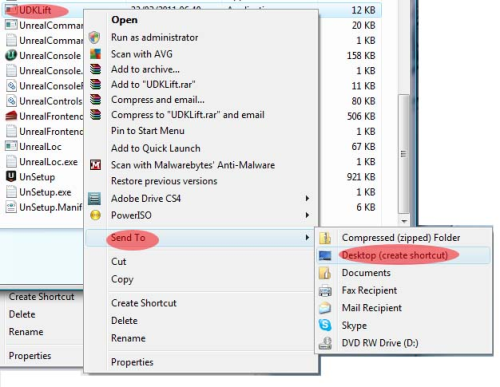
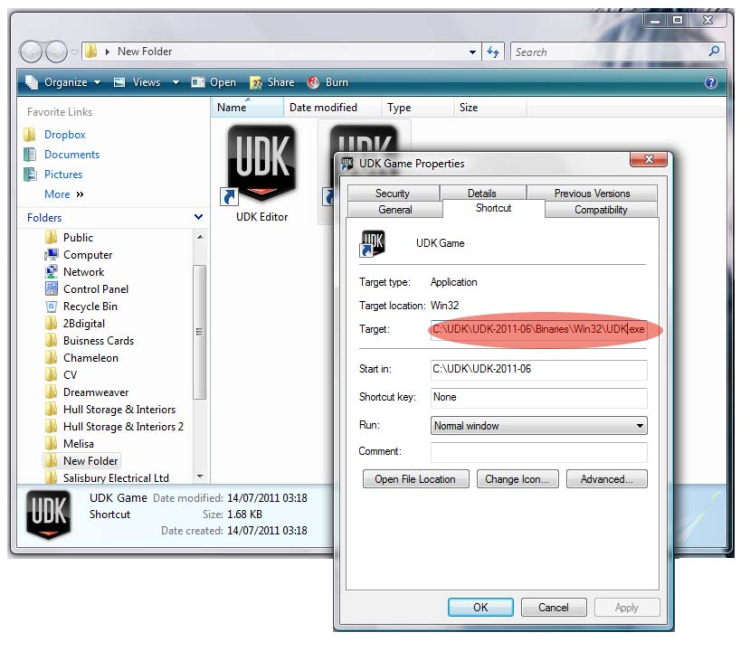
- Another way to launch the editor is to create a shortcut. To do this, go to the installation folder: \UDK\UDK-VersionRelease\Binaries, locate UDKLift.exe, right-click and select Send To | Desktop (create shortcut), as shown in the following screenshot:
- Once on you have created the shortcut on your desktop, right-click the shortcut and select Properties. Then, in the Target box under the Shortcut tab, add editor at the end of the text. It should look something like the following screenshot:
- Now double-click on the desktop icon and launch the UDK Editor.
Autosave
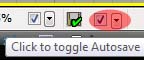
When you first launch the editor, you will have Autosave automatically enabled. This will save your map at a chosen timed interval. You can set how often it will automatically save by clicking the Left Mouse Button (LMB) on the arrow on the bottom-right of the Autosave Interval and choosing the time you want, as shown in the following screenshot:
You will find the Autosave feature at the bottom right of the editor. If you enable Autosave, there are a few options such as Interval and Type.
Save manually by going up to File | Save As.
Content browser
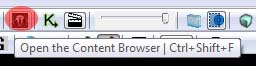
Content browser is where you will find off the game's assets. Placing static meshes (models), textures, sounds, and game entities such as player starts, weapons, and so on, can all be done through the content browser. You will be using the content browser very often. To open the content browser click on the top menu bar, as shown in the following screenshot:
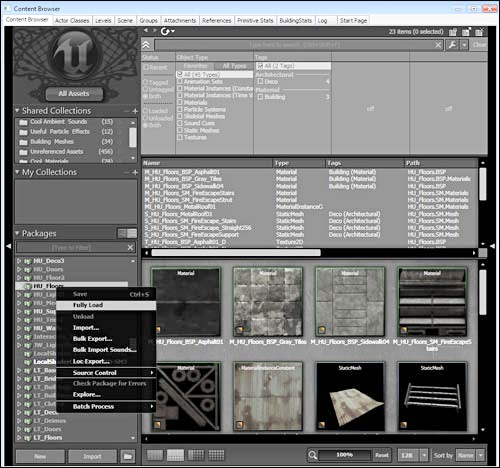
Packages are where you will find specific items contained within the UDK. Things such as static meshes are contained within a package. You can search for a package, or just find the package you want to use and select it as shown in the following screenshot:
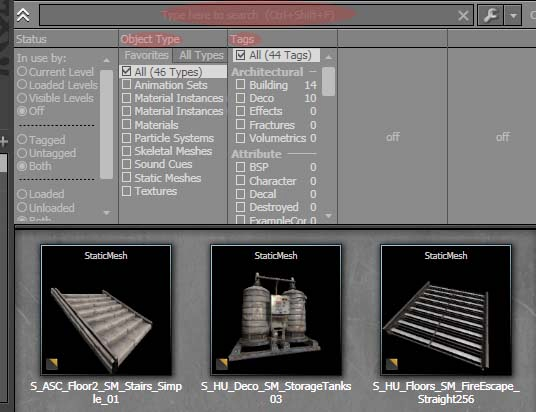
The top of the content browser contains a search box as well as a filter box. This is very useful. You can sort out the content in the browser by animation sets, material instances, static meshes, sounds, and so on. This helps a lot when looking for items. The next screenshot lists full names of the items within a selected package. You can sort by clicking on the Name, Type, Tags, or Path fields, and it will re-arrange the content's preview:
The content browser is one of the most commonly used tools in UDK. Get comfortable using the content browser. Spend some time navigating around it. UDK basics covers the most essential tools and functions you need to know to get started with UDK. You'll be able to quickly jump into UDK and begin feeling comfortable using the most commonly used functions.
What just happened?
So we know how to launch the editor, how to use the Autosave function, and where to find the content browser. We are now going to look at how to move and rotate around the editor.
Time for action – movement and rotation
Time to have a look at movement, rotation, and navigating around the editor.
Navigation
Buttons used to navigate around UDK.
UDK
These are your primary keys for navigating and rotating using the editor:
- Left Mouse Button (LMB): pan right/left/forward/backward movements
- Right Mouse Button (RMB): rotate, look around
- LMB+RMB: up/down
WASD key navigation
The following are other forms of primary keys for navigating and rotating around the editor:
- Click and hold RMB. As you hold it, use the WASD keyboard keys to move around as you would in a first person shooter game.
- WASD movement is great if you are familiar with hammer source mapping.
MAYA users
If you are familiar with Maya, the following will be your primary keys for navigating and rotating around the editor.
- Hold down the U key
- U+ LMB: rotate, look around
- U+ RMB: forward/backward movements
- U+ MMB: right/left/up/down movements
What just happened?
Now that you have installed UDK and know what the content browser is, you are ready to begin. So let's get started.
BSP
The purpose of BSP is to greatly reduce the amount of work the game engine has to perform in real time—to draw polygons on the player's screen.
Why use BSP?
BSP is a great tool to block in your map with. BSP is often used to quickly create and test playable space.
Can I use static meshes to create my map without using BSP?
Yes. Although, you will need a 3D software application that supports UDK's plug-in, such as Autodesk Maya, 3Ds Max, XSI.
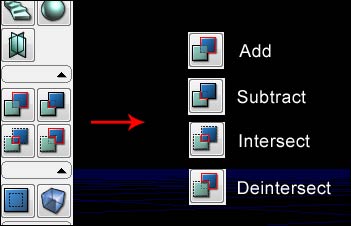
UDK CSG Operations for Brushes include the following:
- CSG Add
- CSG Subtract
- CSG Intersect
- CSG Deintersect
Dominance of static meshes
Static meshes are simply the models in your level. If you open up any UDK map, 90 percent of the map will be static meshes and the rest will be BSP brushes.
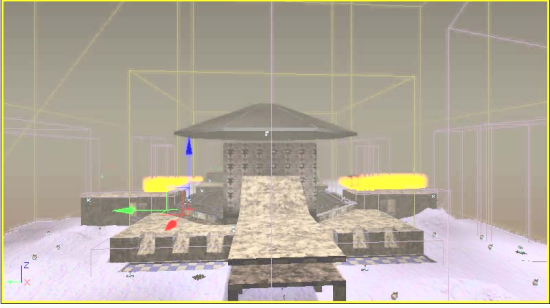
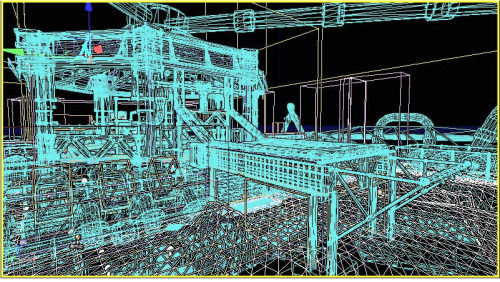
Brushes only, no static meshes
We can see only brushes used in the following image:
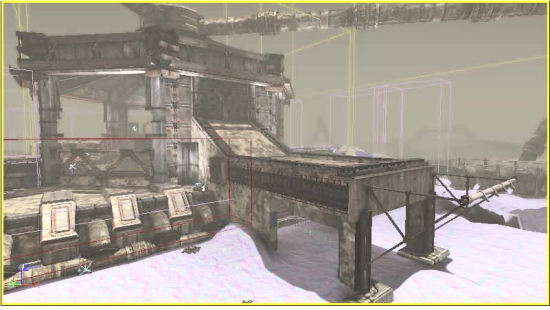
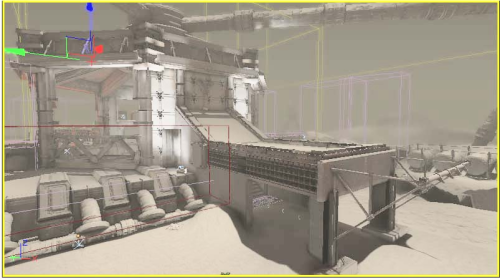
Brushes and static meshes
We can see both brushes and static meshes used in the following image:
Time for action – using BSP brushes and static meshes
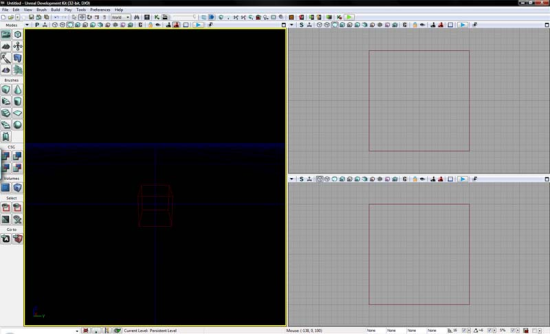
The Red Builder Brush creates BSP brushes. It also acts as a template for creating BSP Geometry and does not show up in the game.
In the previous screenshot you can see that the red builder brush has taken the form of a square template for creating BSP geometry. You can create different sizes and types of BSP.
Hammer source engine still uses BSP operation to construct the main shell of the level, but the majority of next-gen engines heavily rely on static meshes. Static meshes is what you will be using to primarily define how your map looks in UDK. Static meshes are the models that make up the 90 percent of your level. Creating static meshes requires you to have a 3D application, such as XSI, Maya or 3Ds Max, and so on.
- Red builder brush is what you will use to create BSP brushes
- Static meshes is what you'll be using to detail the environment
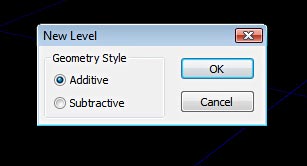
Additive and subtractive
When you create a new map by going to File | New, you are presented with two options to create a map inside UDK: additive and subtractive. The most common and mostly used is the Additive mode.
Additive
Think of an empty space. In the additive method, you would be adding walls, models, and the environment assets into the empty space. A real life example of additive map creation would be constructing a building wall-by-wall.
Subtractive
Think of a solid rock. In the subtractive method, you would be cutting the rooms and environment out of this solid mass. Subtracting the solid rock, in order to have room, is like sculpting.
UDK basics covers the most essential tools and functions you need to know to get started with UDK. You'll be able to quickly jump into UDK and begin feeling comfortable using the most commonly used functions.
Unreal scale and proportions
The scale of a character in Unreal is 96 units.
- 128 UU = 8 feet = 243.8 cm
- 96 UU = 6 feet = 182.9 cm
- 16 UU = 1 foot = 30.5 cm
- 1 UU = 2 cm
Grid snapping
Grid snapping is extremely important. Always work with grid snaps turned on. There are three grid snap options: rotation grid, drag grid, and scale grid. The following screenshot shows the Drag grid option, the Rotation grid option, and the Scale grid option at the bottom-right corner:
Uncheck/check: turns on/off the drag/rotation/scale grids. I would recommend always having this turned on. In some cases, for fine detailed work, you may need to turn it off.
[ ] Bracket keys increase or decrease grid.

Viewport options
The most commonly used viewport is perspective. You will spend most of your time in the perspective viewport. This includes moving, placing, duplicating, and transformation of static meshes and most of your environment creation.

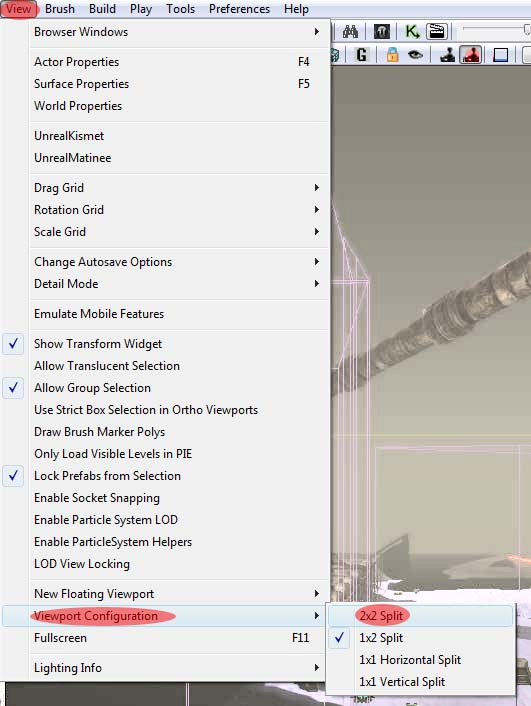
If you go up to View | Viewport Configuration, you have options of how you want to set up your views, which is shown in the following screenshot:
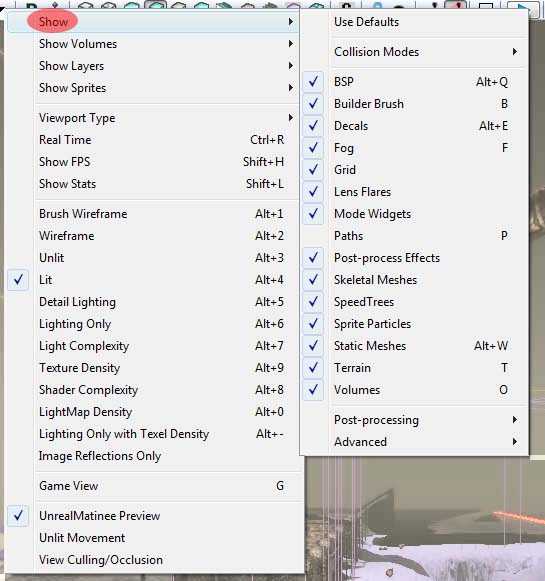
In the drop-down menu for the viewport, there are options of what you want to display. It allows you to hide/unhide specific elements in your perspective viewport, which is very useful when you are working on a specific element during your level creation:
Real Time Preview (RTP) shows the environment as it would look like in the game, complete with sound and particle effects. RTP works best when you have the Game Mode (G) enabled, which turns off the wireframe brush view. This offers the best and most accurate view of what your level will look like in the game.
Here is a list of the different viewport options you will be using when designing in UDK. Some of you will use one more than the others:
- Brush wireframe (Alt+1): shows wireframe brushes that will allow brush selection

- Wireframe (Alt+2): shows wireframe brushes that will not allow brush selection
- Unlit (Alt+3): no lights; makes navigation inside your perspective viewport a bit faster
- Lit (Alt+4): full-lights preview
- Lighting only (Alt+5): lighting only
- Lighting complexity (Alt+6): your lighting complexity
- Texture density (Alt+7): how complex are your textures
- Shader complexity (Alt+8): shader complexity only
- Lightmap density (Alt+9): lightmap density only
- Lighting only with texel density (Alt+0): lighting only with texel density
What just happened?
So we know about using the BSP brushes and static meshes, the additive and subtractive tools, the unreal scale and proportions, the grid snapping, and the different types of viewport options that we will be using when designing in UDK.
Have a go hero – wireframe brush
So we have light in our small room, what's next? Let's see if you can move the wireframe brush and create another surface. It is important that you understand the different uses of the translation and scaling mode options available in this editor.
Pop quiz
What do the following buttons function as?
- Left Mouse Button (LMB)
- Right Mouse Button (RMB)
- LMB+RMB
- WASD
Summary
So we have covered the UDK basics, which are the most essential tools and functions you need to know to get started with UDK. You'll be able to quickly jump into UDK and begin feeling comfortable using the most commonly used functions.
Specifically, we covered:
Unreal Development Kit 3 Beginner’s Guide
A fun, quick, step by step guide to level design and creating your own game world.


Ohh, this will be of great use for me!
Awesome! Great guide