Hey there fellow gamers! Are you ready to step up your virtual shooting game and blow some zombie brains out? Well, you've come to the right place because today we're gonna teach you how to model a gun for playing in VR! Now, before we get started, let's get one thing straight - we are NOT encouraging real-life violence, okay? We just want to have some fun in the virtual world, where no one gets hurt (except for those darn zombies, of course).
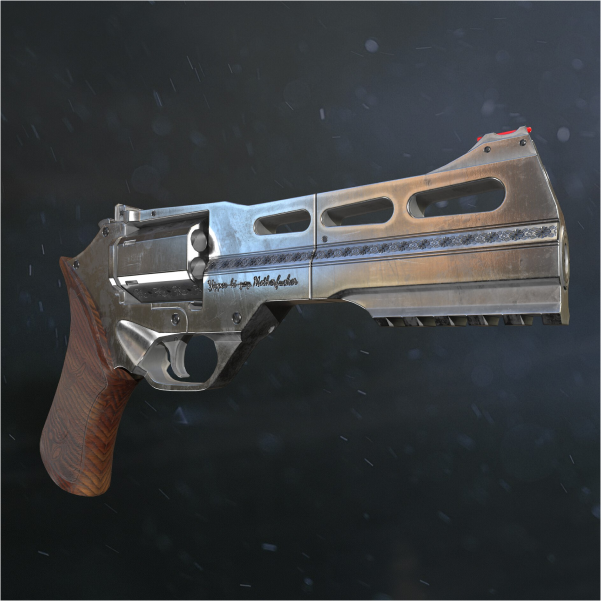
The Rhino revolver, designed and manufactured by Italian firearms company Chiappa Firearms, has several unique features that set it apart from other revolvers on the market. One of the most notable features is the barrel design, which is mounted low in the frame and aligns with the bottom chamber of the cylinder, rather than the top like a traditional revolver. This design helps to reduce recoil and muzzle flip, making the Rhino easier to shoot accurately and more quickly in rapid-fire situations. Additionally, the Rhino has a flat cylinder that makes it easier to carry and conceal, and it is available in a variety of calibers, including .357 Magnum, 9mm, and .40 S&W. Overall, the Rhino is a reliable, accurate, and innovative revolver that appeals to both casual shooters and professionals. In virtual reallity you can use this model in our game Drunk Or Dead2
Step 1. Searching for references.
So, step number one in creating your ultimate VR gun is finding references. You know, like when you're trying to draw something and you need to look at pictures for inspiration? Yeah, it's like that, but with guns.
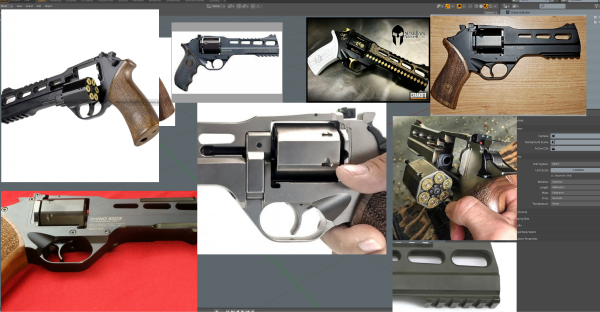
Find images of the type of gun you want to create, from different angles and in various lighting conditions. This will help you get a better understanding of how the gun looks and works. Plus, you'll be able to add some cool details to make it stand out from the generic guns out there.
So, get your search engine fired up and start looking for those gun references!
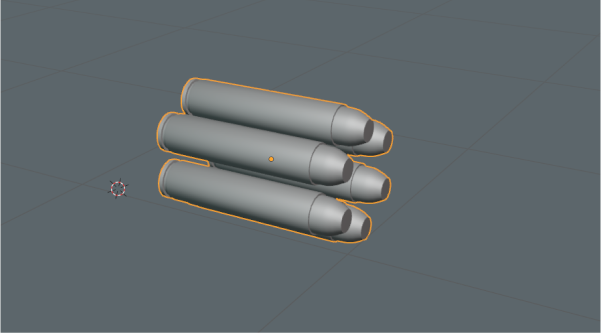
Step 2. Create a 3D model of the bullet.
So, step number two in modeling your VR gun is to create the bullet. Why start with the bullet, you ask? Well, it's actually a practical reason - bullets are often the easiest part of a gun to find reference images for.
Since bullets are a standard size, you can easily find bullet sizes on the internet. This will help you create a more realistic and accurate bullet for your gun. And will serve as a good guide when creating other parts of the weapon.
To create the bullet, you can use a 3D modeling software or even just basic shapes in a program like Microsoft Paint.=) But it is better to use more professional programs such as blender, 3d max, maya,etc.
Start with a cylinder shape, and then add details like the casing, primer, and bullet tip.
Remember, the bullet may be small, but it's an important part of your gun. Plus, once you've mastered the bullet, you'll be more confident in creating other intricate details of the gun.
So, there you have it - step number two in creating your 3D model gun is to start with the bullet. Get those reference images and start modeling!
Step 3. Create the muzzle of the revolver.
Great, let's move on to step number three - creating the muzzle for your VR gun. The muzzle is the opening at the end of the gun where the bullet exits, and it's an important part of the gun's design. Plus, it's just the right size for the bullet you created in the previous step!
To create the muzzle, you can once again use a 3D modeling software or a basic drawing program. Look up the dimensions of the muzzle for the specific gun you're modeling, as these can vary depending on the type of gun.
Fortunately, you can find this information easily on the internet. Many gun manufacturers and enthusiasts have detailed specifications available online, so you can ensure your muzzle is accurate and realistic.
Once you have the dimensions, start by creating a cylindrical shape for the main part of the muzzle. Then, add the details such as the tapering shape and any grooves or markings that the gun has.
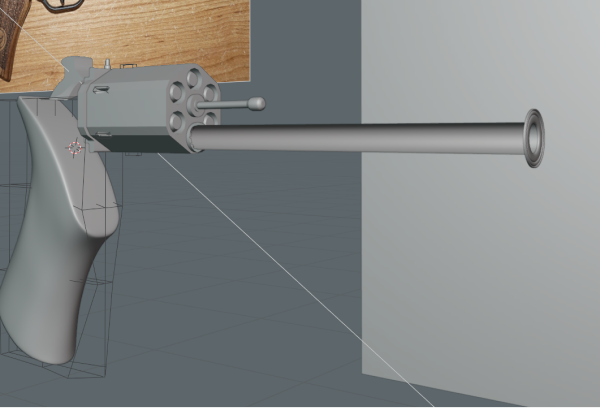
Voila! You now have a muzzle that's just the right size for the bullet you created in step two. And with these two parts done, your gun is already starting to take shape.
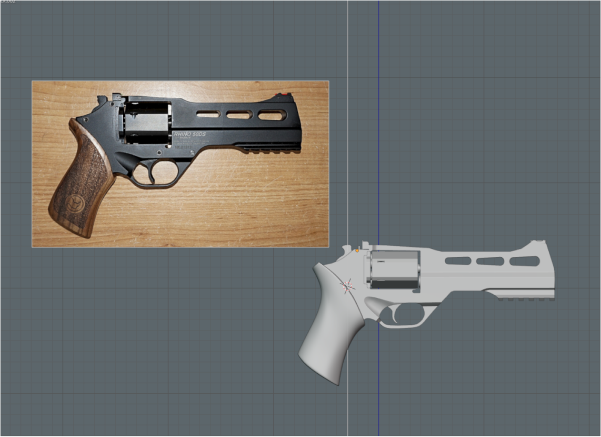
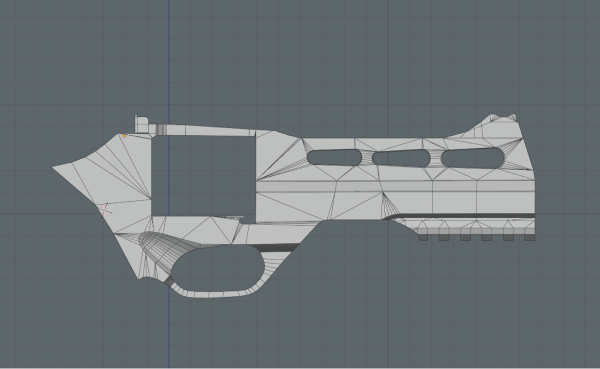
Step 4. Adding elements.
This step involves adding the rest of the parts, a little at a time, to bring your gun to life.
Now that you have the basic components of the gun, it's time to start adding other elements.
These can be the trigger, magazine, sight, and any other unique elements that make your gun stand out. As you add each new detail, be sure to refer back to your reference images to make sure you're capturing the correct shape, size, and placement. This will help ensure that your gun looks and feels authentic in the virtual world.
Don't rush this step - take your time and add each detail gradually. It's better to work slowly and carefully than to rush and end up with a gun that looks sloppy or inaccurate.
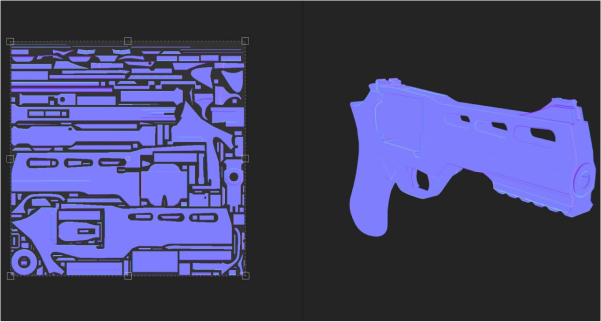
Step 5. Making a UV sweep for objects.
To create a UV layout, you need to use a 3D modeling program that supports UV mapping. Most popular 3D modeling programs such as Blender, Maya, or 3ds Max have this feature.
The process involves unwrapping a 3D model of a weapon and placing it in 2D space. You can then apply textures and materials to specific areas of the UV unfolding to create a more realistic and detailed view of the weapon.
It's important to take your time with this step and ensure that each part of the gun is properly unwrapped and mapped.
Once you have your UV layout created, you can start experimenting with different textures and materials to make your gun stand out. Whether you want a sleek and shiny metallic finish or a weathered and worn look, the UV sweep will be your key to achieving the desired effect.
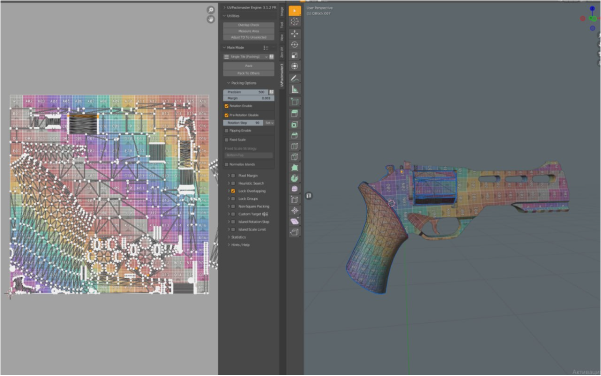
Step 6. Baking the model.
Chamfers are beveled edges on the weapon's surface, and they help give the design depth and realism. To make them more visible, you need to bake them into the weapon's normal map.
Baking involves taking information from a high-polygon model (which includes the chamfers) and transferring it to a low-polygon model. This creates the illusion of greater detail without adding extra polygons. But now there are ways to create chamfers without a high poly model. In our case, I just bake a shader that generates bevels and save a lot of time

Once you've baked the chamfers into the normal map, it's time to test them in the engine. This will allow you to see how they look in the actual game environment, and make any necessary adjustments.
At this point, you can also start texturing your gun. Experiment with different materials and colors to achieve the look you want. Remember to refer back to your reference images and use them as a guide.
Finally, make any final adjustments to the textures and materials in the engine. Test the gun in different lighting conditions to ensure that it looks and feels realistic in all scenarios.
And finally, after all that work, you'll have a fully modeled gun that's ready to take on all those virtual zombies and bad guys! Congratulations, you now have a loopy object that you can be proud of. That's it - your weapons are now fully textured and ready for action! Keep practicing and experimenting with different weapons and designs. Who knows, maybe one day you'll create the perfect gun that everyone will want to use! And don't forget to check out the Drunk Or Dead2 universe. We've got lots of different weapons and lots of reasons to use them ;)