Hello, indieDB Community!
Welcome to the 8th article about our in development game, Nata.
If you want to find out more about our game, check outour other articles on our indieDB page.
In this week’s article, we’re going to show you Nata’s first prototype, and explain some of the process and logic behind the decisions that were made. All models in this prototype are placeholder free-to-use assets.
For the pre-production of Nata we wanted to have all of the core mechanics in place and working together for a test build. Since most of the mechanics are symbiotic, our programmer had to have them all functioning as best as possible.
So, without further ado, here’s our programmer explaining how he created Nata’s first prototype!
Character Movement
The character movement is pretty standard, but the main difference is in the camera controls. We decided to implement a camera movement similar to games such as TOEM, where the camera follows the player, but it doesn’t rotate with them.
Interaction
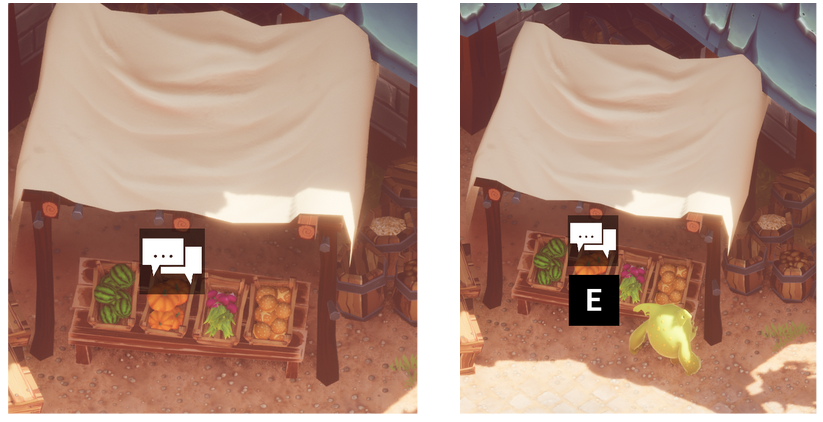
There are plenty of places, objects, or NPCs the player can interact with. All of them are somehow marked (it can be an exclamation mark for quest NPCs for example). The player can then approach and interact, a prompt will appear to tell them what key to press.
Below are two examples:
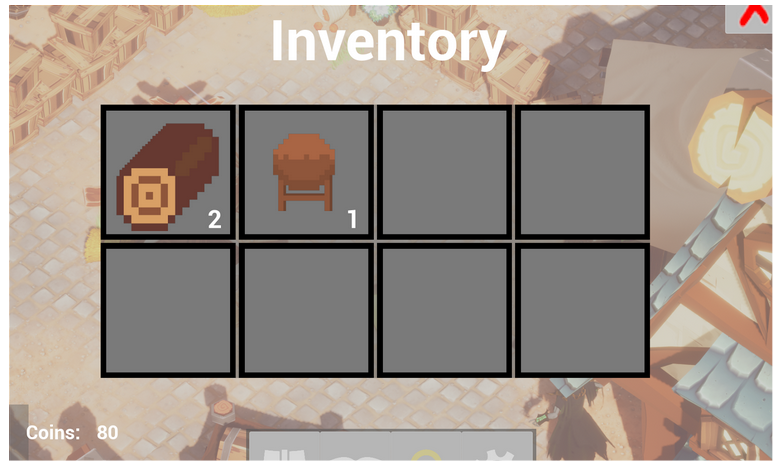
Inventory
The inventory is responsible for helping the player keep track of the items and money they have. It is at the center of every other mechanic, since most of them require the player to either have space in the inventory, or have a certain item or amount of items of a certain type.
It can be accessed through either a key press or by clicking a button in the player HUD.
Dialogue
The dialogue implemented will be given to important NPCs (shopkeepers and quest NPCs). The player must interact with the NPC and a box will appear. This box will show the portraits of both speakers, the name of who is currently speaking, and what the speaker is saying. The dialogue is displayed in a typewriter fashion, but all of it can be shown by pressing the E key as it is being written.
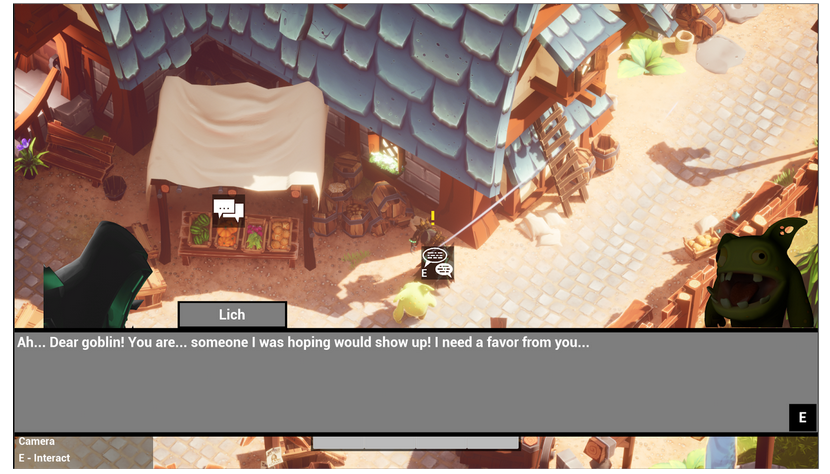
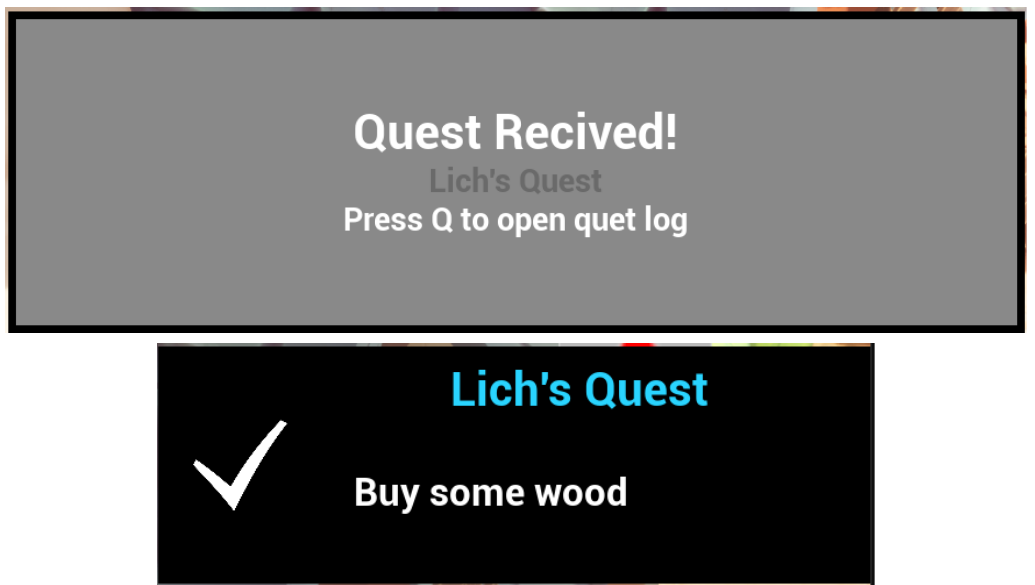
Quests
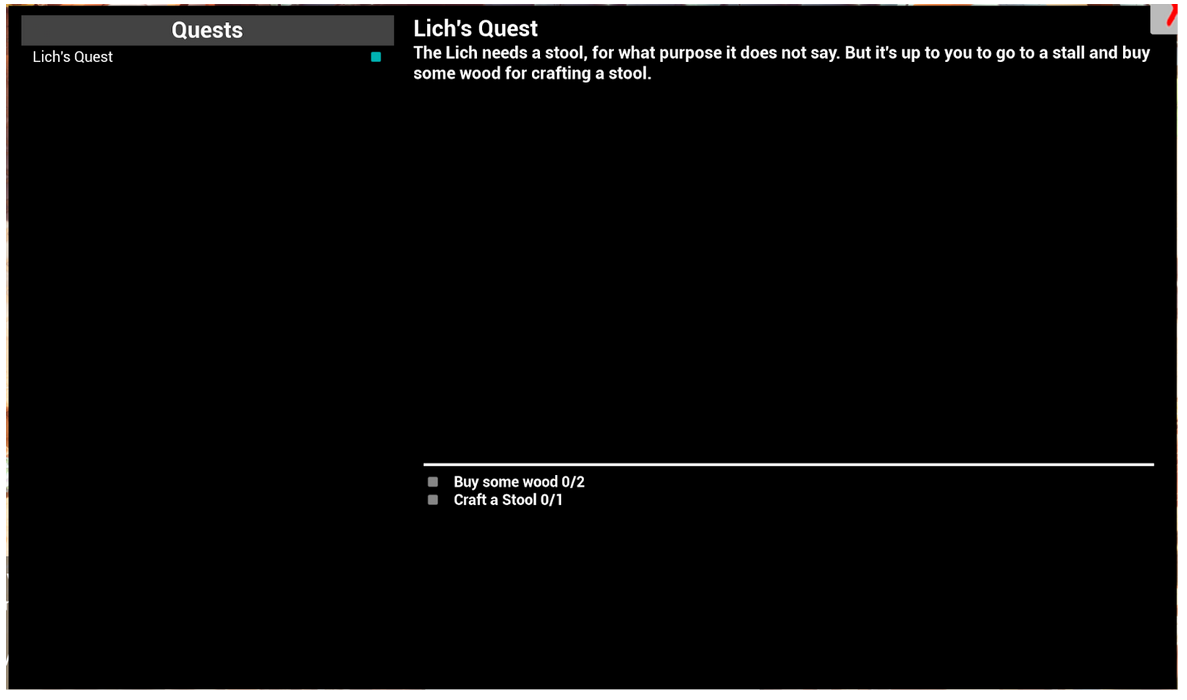
This was the most complex mechanic among all of the ones that were implemented. Certain NPCs will give quests to the player. They will be given after the dialogue ends. The player will have a quest log with all of the quests they have. The log will show the quests name, description and objectives of the current stage.
There are also two pop ups that were implemented for when the player received a quest and one for when they completed an objective.
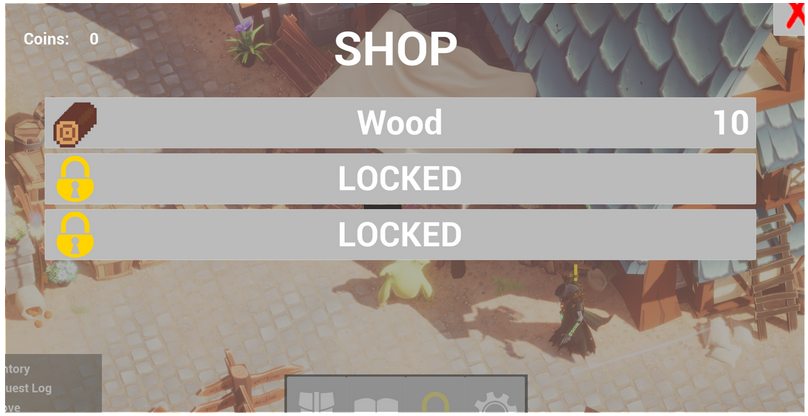
Shop
The shop is not implemented as it was intended. However, for the test build it serves its purpose. As it was implemented a menu is opened when the stall is interacted with, this menu has a few buttons. Clicking on the wood button adds wood to the player’s inventory and removes 10 of the player's currency. If the player has no currency, no item is added to the inventory.
Player HUD
The player HUD is the central part of every menu the player can open. It’s here that the menus are displayed. It is composed of a hotbar that contains buttons for quick access to the players’ menus..

Well, we reached the end of our 8th article!
Next article will be focused on modelling.
See you next week!
![]()


This looks fantastic, the lighting is gourgeous!